

Wish to do something really exquisite and unique with your wedding table cards? Here is an idea for you that will make you aware of the process by which you can easily make your own LED wedding table cards. Things that glow in the dark have always captured the imagination and attention of people since ages. Remember when you were little and always wanted to capture fire flies? And who can forget the moon and stars that look so amazing! Just like all of them the LED wedding table cards that you will make by knowing this DIY process will look amazing at your wedding reception.

Difficulty level: Moderately easy
Time required: 30 minutes to 1 hour for a single card
Estimated cost: $1.25 per LED wedding table card
Things needed

You will require these things to accomplish your task of creating unique LED wedding table cards:
· Binder Clips
· CR2032 Batteries
· LEDs
· Acrylic with protective Film
· 3/8″ Polypropylene Rod
· Safety Glasses
· Dust Mask
· Scissors/Cutter
· Drill
· Dremel Engraver
· Tubing cutter
Procedure

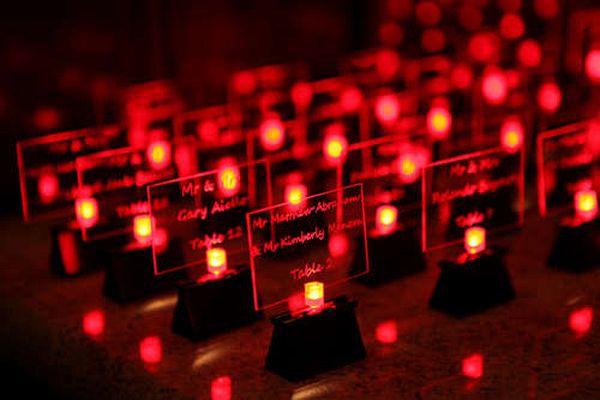
1. Get the LEDs of your favorite color or the color that you think will look nice when glowing. The one shown above is red colored LED and therefore it will make a red glowing LED wedding table card.

2. In the next step you will have to make a holder. This step will take a longer of your time period as you will have to prepare polypropylene widgets that eventually will hold the name cards. Make out 7/16 inches pieces of polypropylene rod so as LED might get fitted into the widget from its bottom part. Now, take a number 11 drill bit and create a hole in the centre of the plastic bit.

3. The next step deals with the preparation of the clips. Paint the poster tabs in the color of the LED. Get rid of the rounded ends of the poster tabs. Taking off the adhesive backing done to it from one of the sides stick each one on every side of the clip.

4. The fourth procedural step involves the name etching or engraving. Take your time and maybe give a practicing hand to your writing before you finally write down your message. Once you feel yourself to be efficient enough to do the job then start doing etching on the name cards.

5. In the final step you will have to assemble everything in order. Get the LEDs inserted into one of the ends of the plastic holder that you created and then onto the another end of it. Ensure that the leads of LED touch up to the battery.
Things to watch out for
· Always try to get a LED that is bright in color so that it glows perfectly.
· Clean up the loose plastic so that the table cards look good in their finishing.
· To ensure a good glowing life of a single LED you must create a pull tab to keep light from getting in until you assemble everything perfectly.