

Props can impart the mesmerizing touch to the wedding photographs. In earlier or the classic era wedding guests use to be more sophisticated. But nowadays people try to enjoy as much as they can at a wedding of their loved one. Props therefore give them a good chance to get clicked in the fun way. This is a wedding rings prop DIY that you can make and let your wedding guests click the beautiful pictures of them, holding the wedding props for the photo booth. Know how this can be created by reading further on.
DIY: How to make your own wedding photo booth
Setting up a wedding photo booth is a great and unique idea. It helps in creating a memorable guestbook for the wedding couple. Besides it also can be used as a wedding favor to the guests. Wedding booths are fun too. For the entire budget conscious couples, who do want to restrict their wedding expenses this idea is too inexpensive. In order to create a homemade photo booth that you can have at your wedding know the DIY process given below.
Difficulty level: Easy
Time required: 20-30 minutes
Things needed
To set a good wedding photo booth, get these things by your side:
- A digital camera
- Digital photo printer
- Few digital photo printer papers
- Table
Procedure
Simply follow the steps given below and you will make a wonderful wedding photo booth by the end:
1. Select some place at your wedding reception area where you will be creating your own wedding photo booth. You will have to set a backdrop for this area as well.
2. Take a table and place the digital camera with the digital photo printer on it. Do not forget to insert the digital photo printer paper.
3. Now, so as to create a photo booth you will have to hang the fabric on the walls that is colored solid. Colors like black, white and red are the best ones to do so.
4. Cover the entire wall of the area that you have marked to be your wedding booth. An adequate wedding photo booth will measure 7 feet tall and 10 feet wide. Get the nails and hammer them to attach the fabric firmly with the wall.
5. The reception tables must have the props sp as to make different poses. Things like hats, feathers and the items that relate to the wedding theme are must to be placed therein.
6. There must be an attendant who ensures that all people get clicked by the wedding photo booth.
7. When a particular photo is clicked then you must get two copies of it printed onto the digital photo printer paper. One must be given to the guests whose picture it is; the other one remains there for the newlyweds to keep as a token of memorable day in their lives.
Things to watch out for
- The wedding photo booth must be aside from the main or the actual seating area.
- Make sure that your wedding venue provider allows you to make a wedding photo booth. Sort out everything before.
- Assign at least two people with the duty regarding capturing pictures and getting them done with the wedding photo booth.
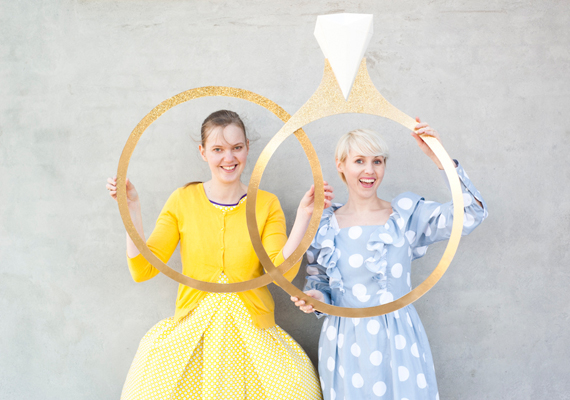
Ring prop for your wedding photo booth

Difficulty level: Moderately easy
Time required: 20-30 minutes
Things needed for the ring prop:

- · A mat board (40 inches by 25 inches)
- · Paper (white) measuring 18 inches by 25 inches
- · X-acto knife
- · Scale
- · Glitter (gold/silver)
- · Double sided tape
- · Glue
- · Gold/Silver spray paint
Procedure
1. Take the white paper that measures 18 inches by 25 inches and make a square out of it. Fold diagonally.

2. Cut the unnecessary paper using the X- acto knife.

3. Fold to make another diagonal intersecting the earlier one.

4. Ensure that you get the diagonal in symmetry.

5. Make more of the intersecting folds to the white square shaped paper.

6. Again fold the paper now as shown in the image below.

7. Taking the folds squeeze the corners and get the midpoint upside down.

8. You will get diamond shape now as shown in the image below. Glue all the parts that you think will hold the shape in order.

9. Now take the mat board that you have glittered with gold or the silver spray paint and cut it with the radius of 35 centimeters (this makes the diameter 70 centimeters). The width of the wedding band should be 3.5 or 4 centimeters. Cut the inner and outer parts of the mat board to get the wedding band as shown here under.

10. Similarly, make another cutting from the mat board to get the wedding rings setting. Insert the diamond shaped white paper to it. Glue with the double sided tape.

11. Give these wedding rings props to your wedding guests to hold and click fun pictures with them. You can also hand these onto the ceiling of the wedding photo booth (if you are using a photo booth at your wedding).

Things to watch out for
- Use the actual guidelines of the measurements. Wedding rings props will look good only when they will be formed large.
- You can decide to opt for the gold or the silver glitter color (whichever you like the most).
- Assign some person with duty of keeping the props safe. Create a duplicate one for back-up.
via: etsy
DIY: iPad wedding photo booth
A traditional photo booth might be a good idea but maybe when you will see this idea, then you will surely give a second thought about the kind of photo booth you would like to install at your wedding. This is the DIY that will make you aware about creating an iPad wedding photo booth. It just needs a little of your precious time to get and know how to assemble up your photo booth with the aid of your iPad. Just keep reading and find out the fun that awaits you. But after your wedding, do not forget to thank your iPad!
Difficulty level: Easy
Time required: 20-30 minutes
Things needed
Just a single iPad won’t accomplish the task for you. So here is all what you will have to gather:
- · EyeFi SD card
- · Digital camera having the remote shutter release
- · iPad connected to EyeFi network
- · A tripod
- · Table
- · Desirable props
Procedure
1. First thing first; you will have to turn on the face recognition feature of your camera and then find out whether the autofocus is able to detect well the wedding guests who have to be photographed.
2. Turn off all the power saving options that you find on your camera and also the iPad.
3. If you are planning for an indoor wedding photo booth then find and connect all the necessary adapters to power the devices (digital camera and the iPad)
4. Get the digital camera mounted to a good stable tripod and place the iPad on a table. You can also look for a stand that can hold both the devices for you.
5. Assign some adult with the responsibility of ensuring that the set-up works pretty well at the time of photo-taking.
6. Bring out some props and let the fun begin with your iPad wedding photo booth.
Things to watch out for
- Ensure that everything is mounted quite stably.
- Do not let the wires run anywhere. Make good arrangements to cover up the wires.
- Also ensure that the devices are connected with one another.