

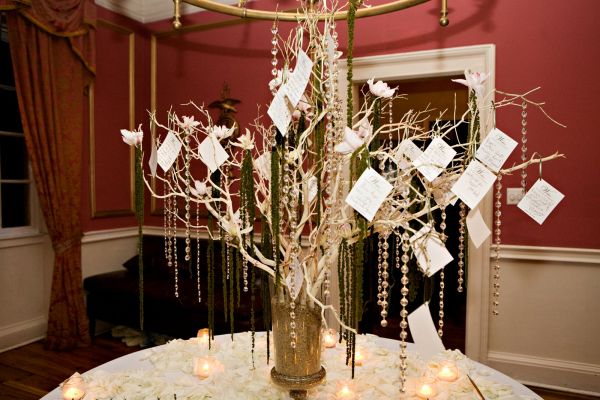
If you do not quite like the idea of the traditional wedding guest-books and wish to create something beautiful for the wedding of yours then here is your take. This is a DIY procedure of making a wedding wishing tree that will give your wedding guests an opportunity to write down the messages on the cards and then hang them on the wishing tree that you have created all on your own. So just start following the pretty DIY method! Scroll down for more.

Difficulty level: Easy
Time required: 5-10 minutes
Things needed
Here are the items that you will need:
· Tree Branches
· A vase
· Spray paint
· Cards
· Ornaments like beads, crystals, etc.
· Floral foam
· Wire
· Ribbon
Procedure
1. Get the best available branches first.
2. After you are done with getting the good looking branches, paint them in the colors like silver, white or just leave them like they are. Even the natural look will go perfectly.
3. Get the vase and place branches into it. For giving an appeal you can use some floral foam at the base as well as in the tertiary branches.
4. Get some pebbles and give a natural look. Pebbles will also help in holding the branches firmly.
5. Choose the wishing cards which you want to include in your wedding. Punch them so that you can tie them with the help of the ribbon to the branches of the wishing tree.
6. To beautify further, add some ornamentation to the branches and feel the magic of the wishing tree that you have just created!
Things to watch out for
· The branches that you select to serve your purpose must not be fragile.
· Do not use the old or the dried up branches as they can get messed up sometimes.